INGREDIENTS:
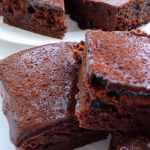
- Eggless Brownie
- 100g (1 cup) dark chocolate, chopped
- 35g (2 ½ tbsp) butter
- 50g (¼ cup) castor sugar
- 50g (¼ cup) brown sugar
- 120g (1/2 cup) yogurt
- ¼ tsp salt
- 1 tsp vanilla
- 48g (¼ cup + 2 tbsp) all-purpose flour
- ½ tsp baking powder
- ¼ tsp baking soda
- 1 tbsp whole milk
CHOCOLATE MOUSSE:
130g (3/4 cup) semi-sweet chocolate
2 tsp gelatine powder
2 tbsp water
240+120ml (1 ½ cup) whipping cream, separated
MIRROR GLAZE
12g (1tbsp+1/2 tsp) gelatine powder
60ml (1/4 cup) water
150g (3/4 cup) sugar
60g (1/2 cup) cocoa powder
80ml (1/3 cup) water
120g (1/2 cup) whipping cream
CHOCOLATE DECO (STRIPS & CURLS)
50g (1/2 cup) semi-sweet chocolate
METHOD:
PREPARING EGGLESS BROWNIE
Preheat oven at 180°C/355°F.
In a bowl, add chocolate and butter. Melt them over a low heat boiling water. Remove from heat and set aside.
In another bowl, add the sugars and yogurt. Whisk vigorously until the sugar is almost dissolved. Add salt and vanilla extract. Mix well.
Add the melted chocolate mixture into the sugar mixture. Mix well until combined.
Sift all the dry ingredients. Gently mix until incorporated. Do not over mix.
Grease a 6-inch round pan, and line a parchment paper at bottom. Pour the batter into the pan.
Bake in preheated oven at 180°C/355°F for 25 minutes.
Let it cool and wrap it with clingfilm and refrigerate to firm it while preparing for the mousse.
PREPARING CHOCOLATE MOUSSE/ASSEMBLE
Cut the chocolate into small chunks and set aside.
In a small milk pot, add gelatine and water. Mix well and set aside.
In a pot, add ½ cup or 120ml whipping cream and lightly bring it to a boil. Remove from the heat and pour it over the cut chocolate. Stir well until it is combined. Make sure the chocolate is completely dissolved and no lumps. If you still find lumps, microwave for 1 minute.
In a large bowl, add the remaining of whipping cream. Mix until soft peaks form.
Melt the gelatine over the heat, and then pour the gelatine into the chocolate mixture. Mix well.
Add the whipping cream into the chocolate mixture in few batches. After 2 batches, pour the chocolate mixture into the remaining whipping cream, and use a mixer to mix it well, until creamy and smooth.
Bring out the brownie from the fridge. Unwrap the clingflim and place it on a prepared 7-inch cake ring. Place the brownie in the middle of the ring. Pour the chocolate cream mixture into the ring. Spread it evenly and tap few time on the table, so that the surface is even.
Refrigerate for at least 6 hours or overnight, until it is completely firm.
PREPARING MIRROR GLAZE :
In a milk pot, add gelatine and water. Mix well and set aside for at least 5 min.
In another pot, add sugar and cocoa powder, a quick mix. Then add water and whipping cream. Mix until everything is combined well. Over a low medium heat, bring the mixture to a boil. Once you see bubbles, remove from the heat. Sift the mixture into a glass container. Set it aside to cool or until it reaches 35°C/95°F.
Bring the firmed mousse from the fridge. Remove it from the ring. Once the mirror glaze reaches 35°C/95°F, pour it over the mousse cake. Let the chocolate drips until it stops. Use an offset spatula to clean up the drips. Add some grated chocolate around the rim of the cake. Refrigerate the cake for 1-2 hours.
PREPARING THE CHOCOLATE DECO :
Melt the chocolate in the microwave for 1 minute.
Spread the melted chocolate evenly on a plastic strip. You can also use a non-stick parchment paper. Use a scraper comb to draw across the chocolate. Place the strip in a small cake pan against the side of the pan. Refrigerate for 5-10 minutes.
For the curls, spread the melted chocolate evenly on a plastic strip. Let it set for 3-5 minutes or until it is almost dry. Use a cake scraper to scrap the chocolate. You will need to try a few times. If the chocolate is not set, let it sit for another minutes.
Decorate the cake with the chocolate strips and curls.
Cut the cake and ready to serve.
Enjoy!


